What is a Sendlog and why do you need that?
It is mainly a special Data Extension where a record will be saved for each message sent. You can create a standard one for Email, SMS and Push.
Each one will have its default fields and you can extend them according to your needs.
More information in the official Salesforce docs.
How to create a Sendlog?
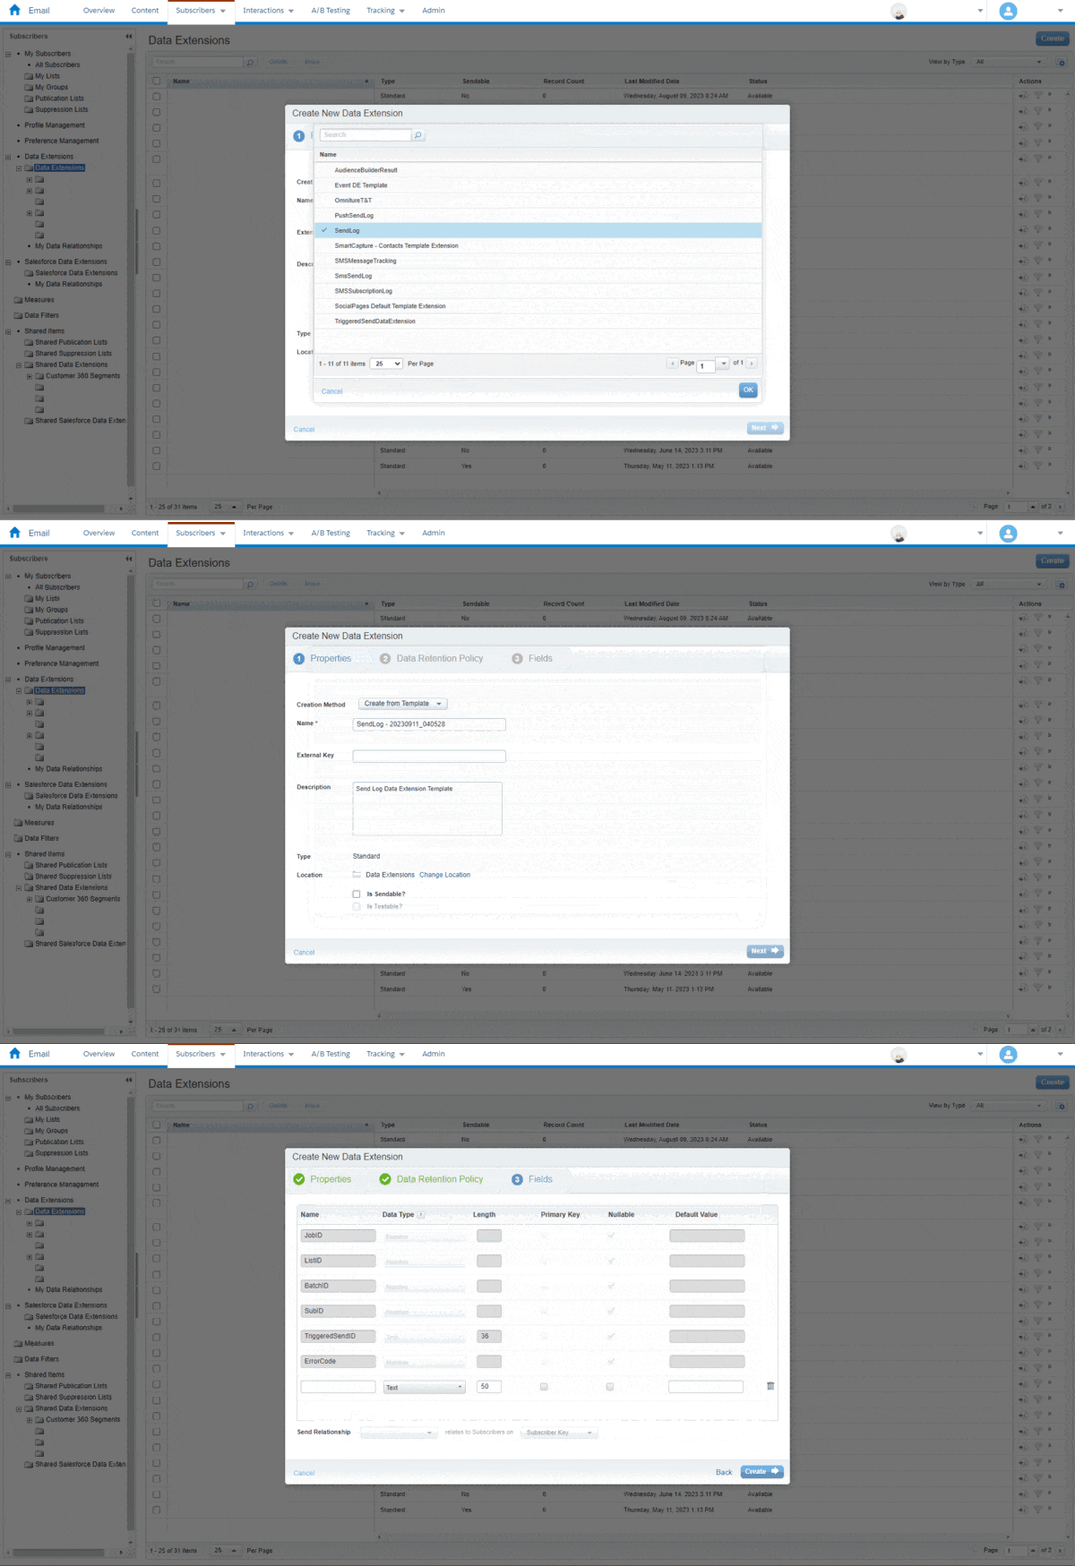
To create it, go to Email Studio > Subscribers > Data Extensions. Then, with the Create > Create from Template button. Using the Sendlog template will add the default fields but you can add more.
The current names of the templates are:
SendLog (for Email)
SmsSendLog
PushSendLog
Choose an appropriate name such as "SystemEmailSendlog" and create.

If you do not have the template available, you will need to upload a case to Salesforce Support to have it enabled in your Business Unit.
I recommend adding some additional fields in each sendlog. These are filled with the predefined Personalization Strings.
Email Sendlog
| Field Name | Field Type | Field Description |
| emailname_ | Text (300) | Email Name |
| emailaddr | Email Address | Subscriber email |
| subscriberid | Number | Internal Subscriber ID |
| view_email_url | Text (2000) | URL to see the email as a webpage. Useful for audits. |
SMS Sendlog
| Field Name | Field Type | Field Description |
| MOBILE_NUMBER | Phone | Subscriber Phone number |
| SHORT_CODE | Number | Sender Phone number |
How to extend your Sendlog
It is possible to add custom fields and fill them in during or after sending the Email or SMS. Always add them as "Not required" as it may happen that sometimes there are empty values and you still need the row to be saved.
Using SQL
Using data such as JobID and SubscriberKey, we can, through an SQL Query, make joins with other tables and fill the columns with data once the sending is done.
An automation can be executed (normally) up to once per hour, although it is ideal not to use the same table for everything so as not to impact the performance of the system.
Using a field in your Sendable DE
If there is a field in your audience table with the same name as in the sendlog, the value will be copied into the column. This is useful for storing a Purchase Order ID associated with the email sending, for example.
Using AMPScript
You can also fill them using AMPScript. And it is very easy. For that, in the message to send, we will assign an AMPScript variable with the name of the field in the Sendlog. Below is an example.
Using a small AMPScript in the email piece or SMS, which can be in a template:
%%[
  set @SubscriberKey = _subscriberkey
  set @DERowKey = AttributeValue("_CustomObjectKey")
  set @RenderDate = Now()
  set @CouponCode = "NN1234NN"
]%%
These are the fields that we must add to the sendlog table:
| Field Name | Field Type | Field Description |
| DERowKey | Number | Hidden row number in the audience table. |
| SubscriberKey | Text (254) | Person ID |
| RenderDate | Date | Date and time of execution of the code |
| CouponCode | Text (50) | Custom field example |
To get the DERowKey, query the audience using SQL:SELECT _CustomObjectKey AS DERowKey, SubscriberKey FROM [YourAudienceTable]
Summary
We have seen how to create a Sendlog, add custom fields and fill them with information in different ways. With this data you will be able to make more complete and useful reports or audits.
I hope you found it useful.
I'll see you in the next article ✨

